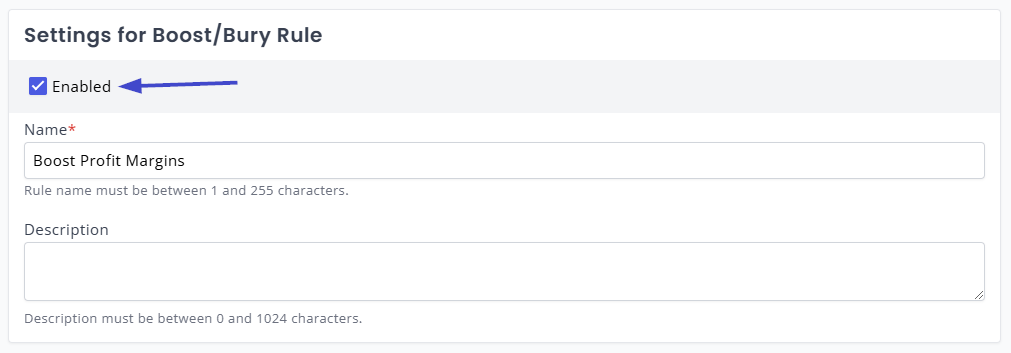
Appearance
How-To: Boost Brand-Specific Products
This page describes how to set up a merchandising rule to boost the visibility of brand-specific products in search and recommendations. The purpose of this is to help promote specific brands across your site.
If you want to boost a brand only within a specific category, please refer to our guide on merchandising on specific categories.
To set this up, you will need:
- Brand data integrated into Relewise. Brand data can exist either as a relation to a Brand entity (this is the recommended approach), or as a data key containing the name of the brand. If you are using a data key, ensure that it is a String or a MultiLingual.
To check whether this data is available on your products, confer with the products available on the Entities page.
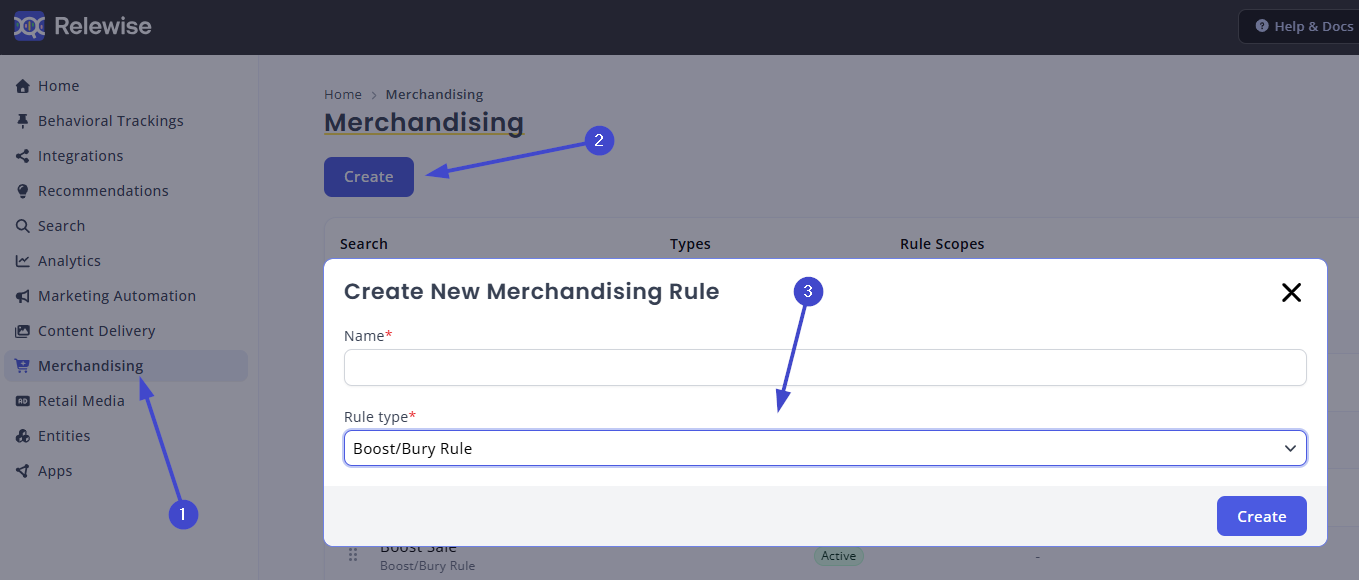
Setting up the Boost Rule
To create this rule, navigate to the Merchandising -> Rules area of My Relewise. From here, click Create new rule and select Rule Type: Boost/Bury Rule.
Rule scope
From here, select the rule scope. If you wish to affect all requests sent to Relewise, simply leave the rule scope blank — no selection automatically includes all search and recommendation types.
Alternatively, check off the type(s) of search or recommendations that you wish to affect. If you are unsure about the type of search or recommendation requests you are using, you can refer to the Live View pages for Search and Recommendation, and cross-reference the incoming request types against the list of available options in the Merchandising interface.
Target entities
This is where you decide what products should be affected by the rule you are setting up. To better understand how to target various entity types, go here.
To select your brand, click on the Edit-button next to "Target Entities", and select the appropriate data type - either "Matches a Brand", or "Matches Product Data".
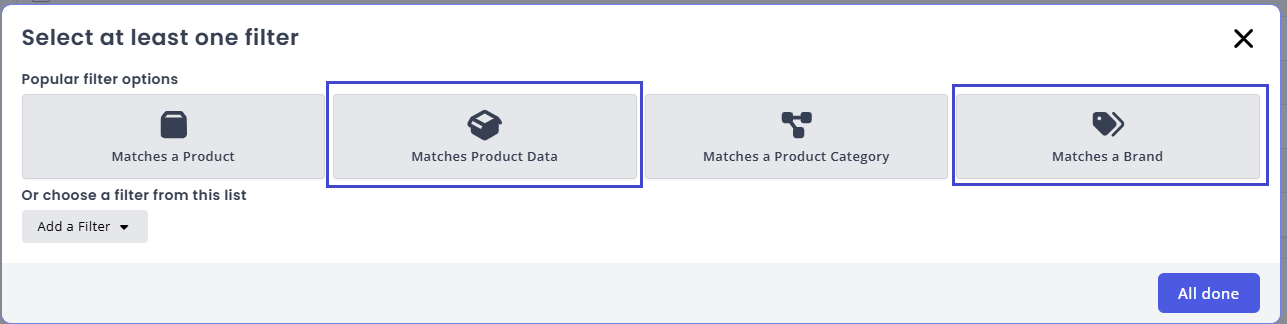
From here, enter the name of the brand you wish to boost, or the name and the value of the data key that you want to boost.
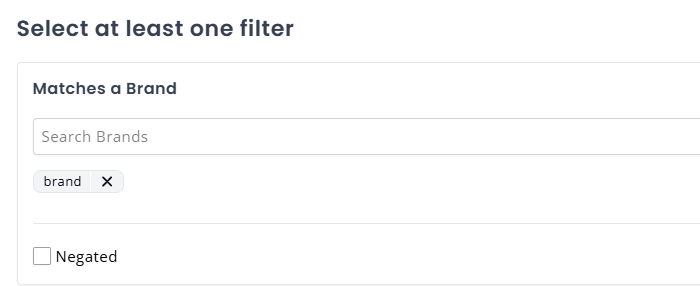
Specify your brand as a Brand entity...
If you are using a data key, you must specify that the Condition is set to Equals and that Type is set to Text / String. Then enter the name of your brand in the Data Value field.

...or as a datakey.
Defining the Boost
Once you have defined what entities to target, you can choose how much to boost the products by. There is no single correct value; you should experiment to find a balance between promoting these products and preserving visibility of others. Adjust and experiment with the values until you find what works for you.
To boost, you can either select one of the premade values in the dropdown menu or select the Custom value and enter your own percentage into the field. Positive values entered here will boost the products, while negative values will bury them.
Finishing Up
Once you have specified the boost value, you can save your merchandising rule, and it will take effect within a few seconds. We highly recommend always double-checking that your rules are performing as you intended. To test a rule, you can use the "Enabled" toggle at the top of the screen to turn it on and off and compare results on the frontend of your website.