Appearance
Merchandising
Merchandising allows you to make advanced rules to govern the way your search and recommendations behave. It allows you to highlight or bury entities, to help drive views and conversion rates for the products you deem important.
Creating a Merchandising Rule
From the My Relewise control panel, you can easily create and manage your Merchandising rules.
Creating a rule requires two pieces:
- Rule Scope - where and when the rule is active. You can combine several scope criteria such as Search, Recommendations, Locations, Languages, Currencies, User Conditions, and Request Filters.
- Target entities – the products or content affected by the rule. In Boost/Bury and Pin rules this section is labeled Target entities, while Filter rules use Entities to exclude (filter).
A single rule may include multiple scopes and target several entities at once.
Scheduling
Scheduling allows you to control when a merchandising rule is active by setting a specific start and/or end time. This feature ensures your rules are applied exactly when needed, without requiring manual intervention.
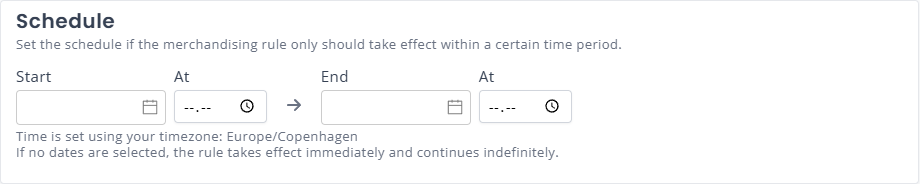
To schedule a rule, you can specify:
- Start: The date and time when the rule should begin.
- End: The date and time when the rule should stop.
If no start date is provided, the rule will take effect immediately. If no end date is set, the rule will remain active continuously. Time is set using your local timezone (e.g., Europe/Copenhagen).
Example
Scheduling is ideal for automating time-sensitive campaigns, such as boosting sale items during Black Friday or promoting seasonal products.
Rule Scope
In My Relewise, the Rule Scope defines when and where a merchandising rule is applied. Configure each tab to fine-tune the scope:
- Search – Select which search requests the rule should affect. If no search type is chosen, all search requests are included. You can also restrict the rule to trigger only when the search term matches specific values.
- Recommendations – Choose which recommendation types are covered. Leaving this blank applies the rule to every recommendation type. Once you pick a recommendation type, only the search types selected in the Search tab will trigger the rule.
- Locations – Target a specific page or page type, such as the Product Details Page or the Power Step. All requests from the selected location will be affected.
- Languages – Limit the rule to certain languages. With no language selected, the rule applies in every language.
- Currencies – Limit the rule to specific currencies. With no currency selected, it applies to all currencies.
- User Conditions – Restrict the rule based on visitor attributes like login state or segment tags.
- Search Terms – Restrict the rule based on whether or not the rule contains search terms.
- Request Filters - Trigger the rule only when the request includes or excludes specific filters, or falls within a filter count range.
My Relewise automatically lists the request types detected on your site.
Search Terms
In this tab you can control whether the rule should only work for requests without, with, or for specific search terms. Here you can control whether you want to limit the rule to without or with search terms:

You can also use Search Terms to make a rule active only for specific queries.
It's possible to add one or more terms that must match the user’s query. For each term, choose a match type:
- Equals — the query matches exactly
- Contains — the query includes the term anywhere
- Starts with — the query begins with the term
- Ends with — the query ends with the term
Combine multiple terms with AND or OR to create more advanced logic.
Request Filters
Use Request Filters when a rule should only apply if the search or recommendation call contains certain filters—or omits them entirely. This is useful for targeting specific categories, brands, or other filter values.
Assigning merchandising to a category filter
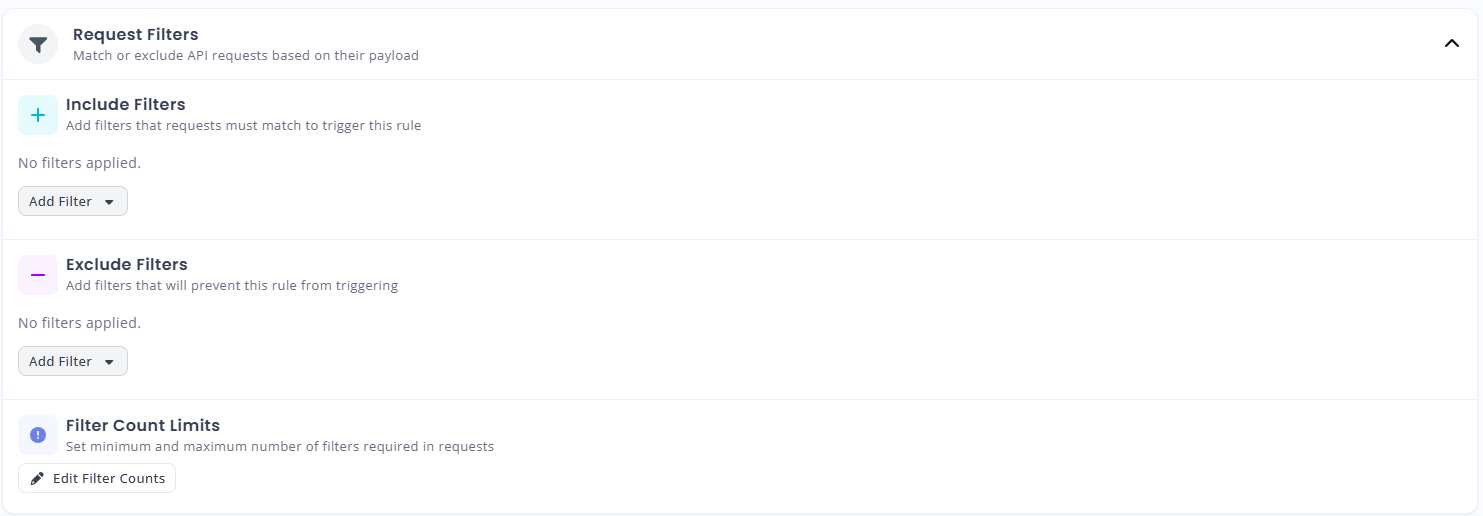
Include filters
Add filters the request must include for the rule to trigger.
Exclude filters
Add filters the request must not include for the rule to trigger.
Filter count
Trigger the rule only when the number of filters in the request falls within the specified minimum and/or maximum.
For a hands-on example of this, see our How-to guide for Merchandising on Specific Categories.
Target Entities
Target Entities refers to the entities that you want to target with your rule. This can be a particular product, a product category, a content page, a Brand ID, a particular product tag, etc. Use the drop-down selector to pick the rule logic you want to apply. You may also combine multiple logics by using and and or filters. See the negated targets section for an example of this.

Use the "Add Filter" button to select your target entities.
- Match a Product: This filter matches with one or more Product IDs. You can search by product name or Product ID, and a list of suggested products will be presented to you. Each product needs to be added separately, so it is recommended to only use this for rules applying to a few products, or as a Negated target to filter out a handful of products from an otherwise active filter.
- Match Product Data: This filter matches with one or more Data Keys present on a product, e.g., ProductType, InStock, or Vendor. The Data Key is then given a condition for the rule to apply: To either equal, contain, be distinct from, be less than or be greater than a given value.
- Match a Product Category: This filter matches with one or more Product Category IDs.
- Match a Brand: This filter matches with one or more Brand IDs.
Negated targets
Negated targets allow you to sort exceptions out of the filters you are setting up. For example, you might want to create a Merchandising Rule that targets all but two products from a particular Product Category. In this instance, you would create a Rule that targets the Product Category ID, and then a second target that negates the two products you do not want to boost.
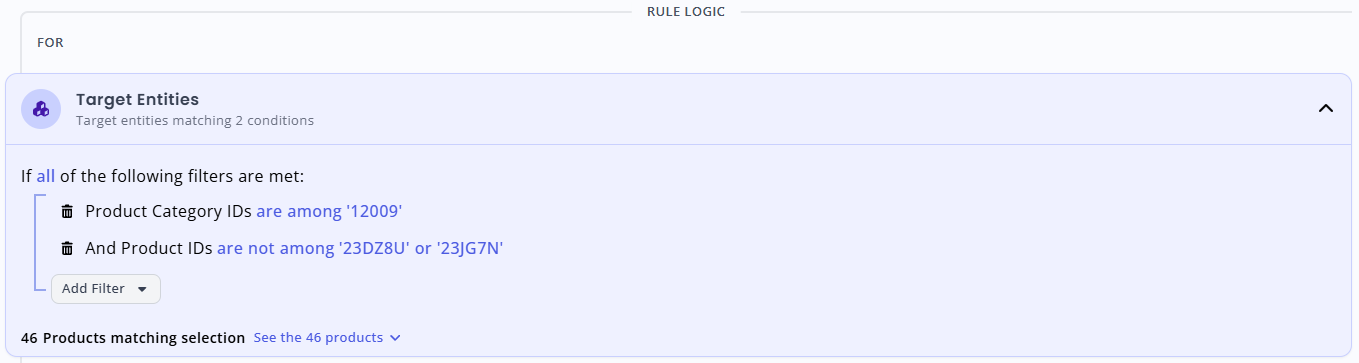
Example of a Negated rule that includes a Product Category, but excludes two particular Product IDs
Boost/Bury Rule
When creating a Boost/Bury Rule, you must specify a value by which to affect the relative weight of the affected entities. Note that the weight by which the Boost/Bury Rule affects the entity is relative. This means that an entity with a high personalization score can still show up after being buried, if its personalization score still outweighs other entities in the results list.
The My Relewise interface allows you to set your boost/bury value in two ways: Either by entering a percentile value, or by referencing a data field on the affected entities.
Boost/Bury by Percentile Value
Setting a percentile value for your boost/bury rule ensures that all entities targeted by the rule will be affected by the same relative amount.
You can either select a value from the dropdown provided, or select the Custom field, which allows you to enter your own percentage value.
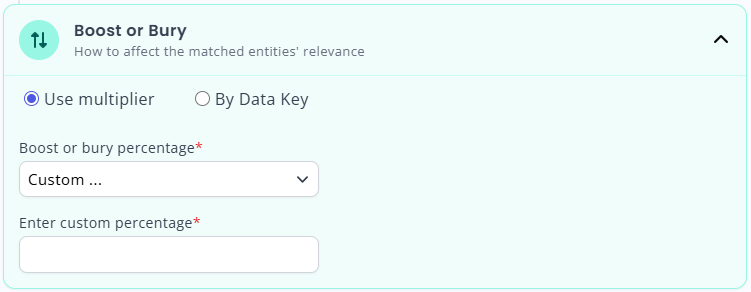
Enter a custom percentage value, or choose one from the dropdown
To put the percentages into perspective, a product being boosted by 100% will count for twice its normal weighting, and require half as much personalized relevance to be shown towards the top of the results compared to other products. Likewise, a product being buried by 50% will have its relative weight in the result ranking reduced to half, and will require twice as much relevance to be shown towards the top.
Boost/Bury by Data Key
A Merchandising rule can also boost or bury entities based on a Data Key held within each entity; to do so, select "by Data Key" and specify the name of the Data Key found on the entity.
The Data Key must be a double, with a value above 0.
When evaluating a Data Key in this way, Relewise uses the value as a multiplier for the entity's relative weighting. In other words, a Data Key value above 1 will boost the product, while a value below 1 will bury it.
Weight calculation examples
A Data Key value of 1.2 will boost the relative weighting by 20%.
A Data Key value of 0.8 will bury the relative weighting by 20%.
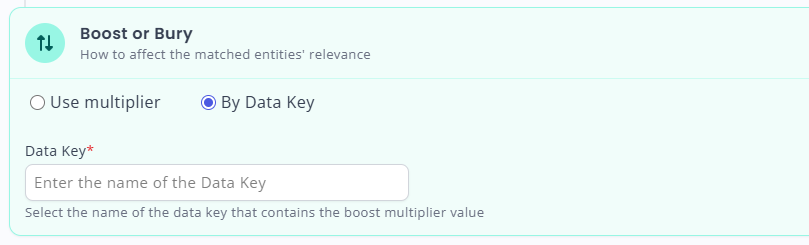
Enter a valid Data Key from which to pull the boost/bury value on each entity
Pin Rule
A Pin Rule imbued with multiple Entity IDs will display the entities in order, starting from the position specified in the Pin Rule. As such, it is not possible to pin multiple entities to the same position and have them alternate between page refreshes; the list of products will simply start at the specified position, and occupy the subsequent recommendation slots in sequence.
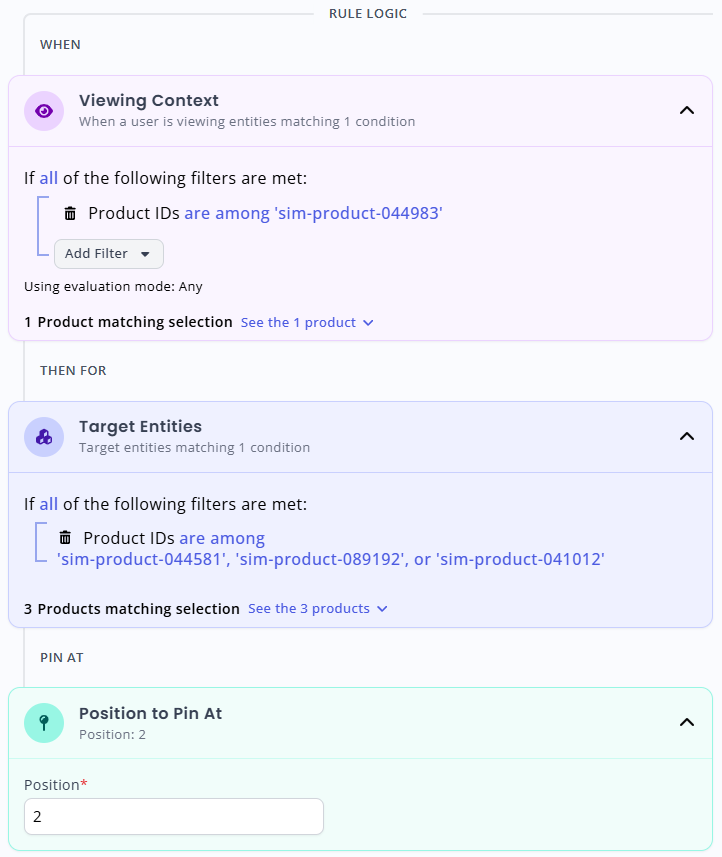
Example of a Pin Rule with multiple Product IDs pinned to a single product's recommendation slider, starting at position 2.
To set up a Pin Rule, you must specify the Entity ID(s) that you wish to pin. You cannot pin entities based on a Data Key - which means that you cannot pin products on the basis of product category or similar.