Appearance
Free Trial Exercise 3: Merchandising
Creating synonyms is easy and intuitive. Now let us move on to something a little more complex, but also massively useful as a webshop owner. The ability to nudge your users into seeing certain products, without outright forcing it on them, is invaluable, and with Merchandising you can create a series of rules that shape the user experience of your site. A delicate touch that can help greatly improve your view- and conversion rates.
The Purpose of Merchandising
At its core, Merchandising is about nudging. The rules you create will either boost, bury, or filter out certain products from search and/or recommendation sliders, and this can help you advocate certain products that you know have a high conversion but low viewership, or bury some products that are prone to getting returned and refunded.
For this exercise, we will focus on a Boost rule, but the principles are identical for almost every rule that you make. Please note that Merchandising is an incredibly powerful tool, and if you decide to purchase a full Relewise license and experiment with it on your live site, we urge you to reach out and confer with us before you dig too deep. At the very least, we recommend that you read our in-depth documentation before continuing.
But for now, let us create a Merchandising rule!
Step 1: Naming the rule
Start by going to MyRelewise and navigating to Merchandising → Rules. From here, click 'Create new rule', and you will be presented with a simple interface. Name your Rule - for this Exercise we will name it "Boost 50%" - and select the type "Boost/Bury rule":

Step 2: Affected Context
Now that we are editing the Merchandising rule, the first thing we need to set up is what context it should apply to. We might want to, for instance, apply a boost rule to searches, but not to recommendations, or vice versa. Let us set up a rule that boosts a certain product by 50% in the product search.
We can break this goal up into three distinct parts:
- It must apply to the context Product Search
- It must apply to a specific product
- It must apply a 50% boost to the product in the abovementioned context
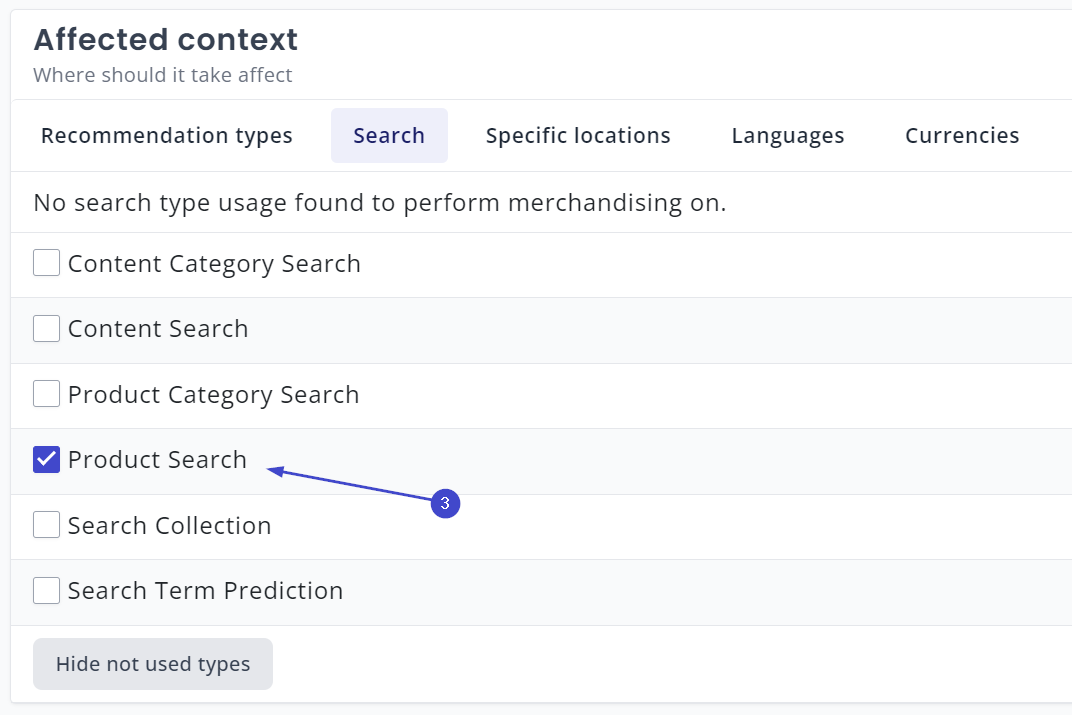
While editing the rule, we look under Affected Context, and select Search. Here, we hit the button 'Show all types', and find the desired context type - in this case, Product Search:

Step 3: Targeting
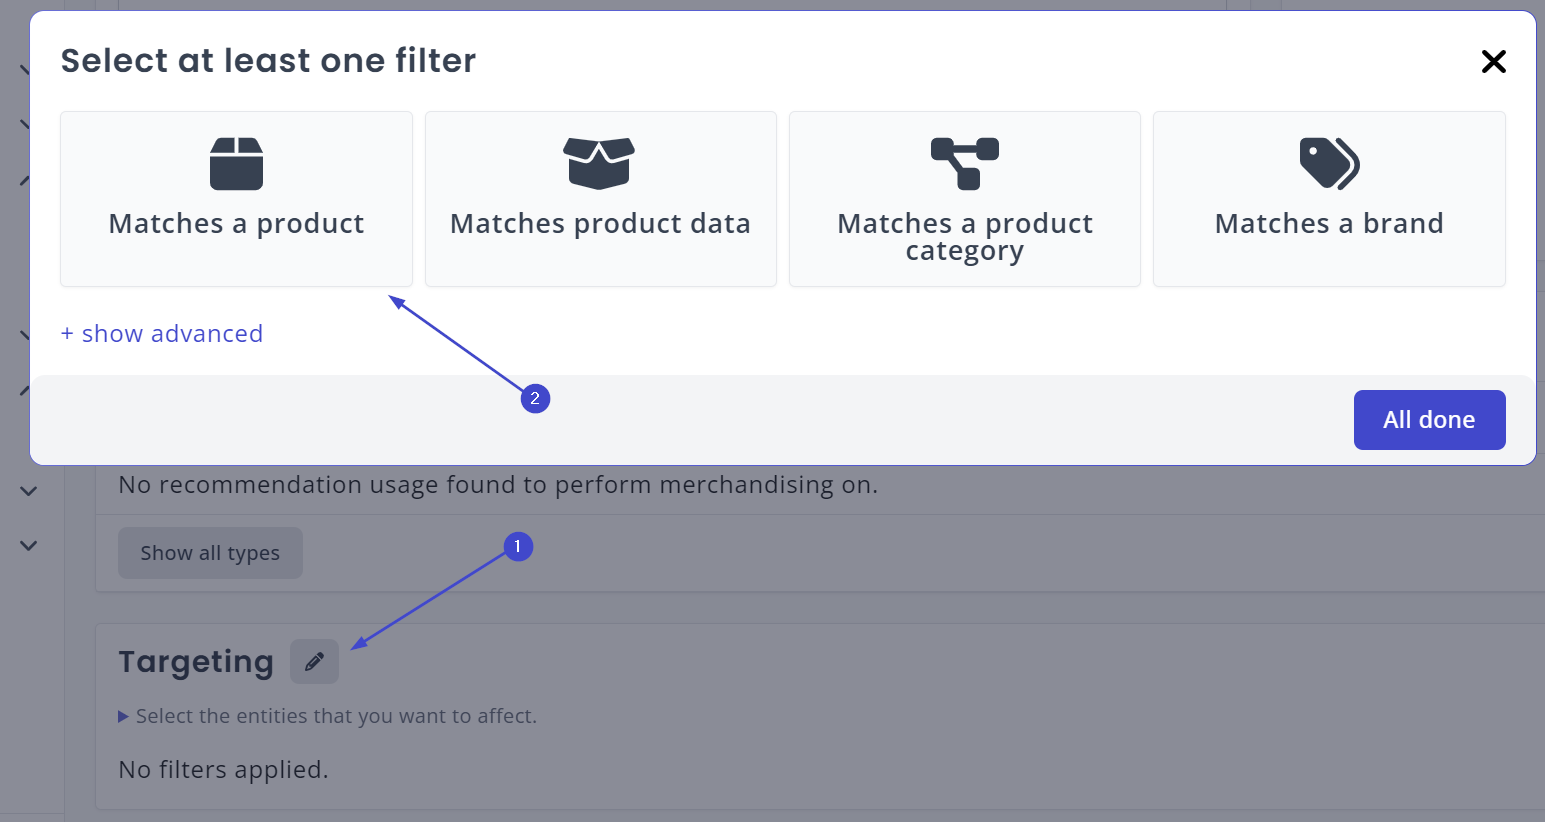
Then next step is determining what entity we actually want to affect with this rule. We know that it must be a specific product, so we click the Edit button, and select "Matches a product".
Naturally, you may be working off of your own data set; if so, select a product that fulfills the following criteria:
- It shares one or more keywords with at least two other products
- It is not the first product to be presented to you when you search for one of the relevant keywords.
The goal is to demonstrate the power of the boost function, so it is essential that you choose a product that is not already the topmost result for a query. For this Demo, we are using the product Smart Thermostat with ProductId 82. This product shares a keyword - smart - with several other products, but it is not the first we find when we search for it. But our Merchandising rule is about to change that.
From having chosen "Matches a Product," enter the name or product ID of the product you want to associate with this rule. You can do multiple products at once (although we recommend not doing more than around five in this manner, as there are better ways of targeting larger groups of products), but for now, one product will do. Select it, and hit "All done" to return to the previous screen.
Boost or Bury
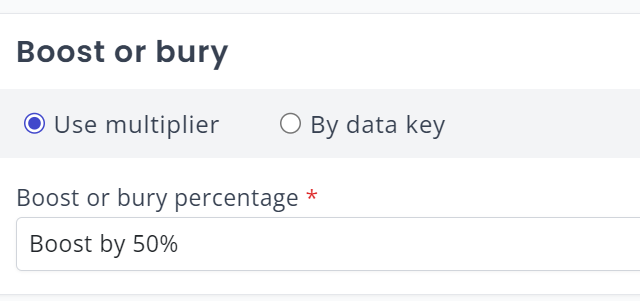
We are almost done. Now that we have defined the context and the entities being affected, we can now define what should actually happen. Since we want to boost this product's visibility by 50 percent, we select "Boost by 50%" from the drop-down menu:
With this done, simply press Save Rule to commit what you have created to the MyRelewise server.
Time to test it out!
Account for a minute or two before the rule has gone live on your site. Once it has, however, you can navigate to your demo site and input the search query that you know should produce your desired product. In the case of our demo, we go from the product being last, to it being first:
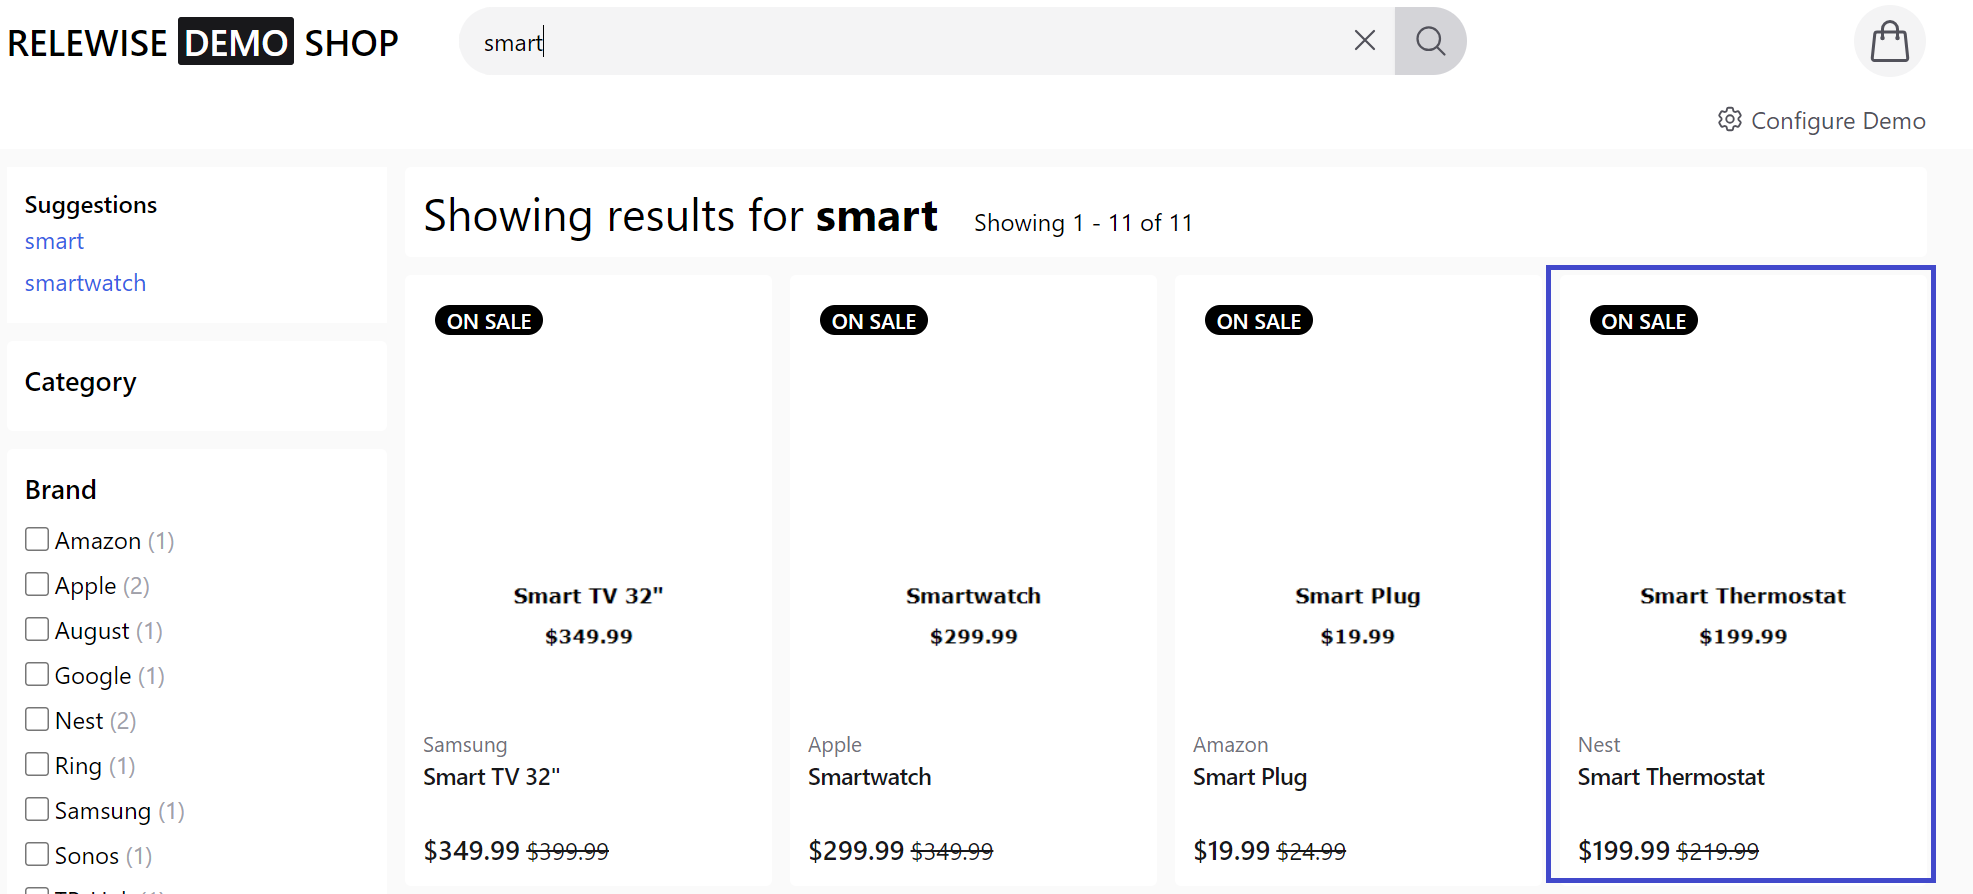
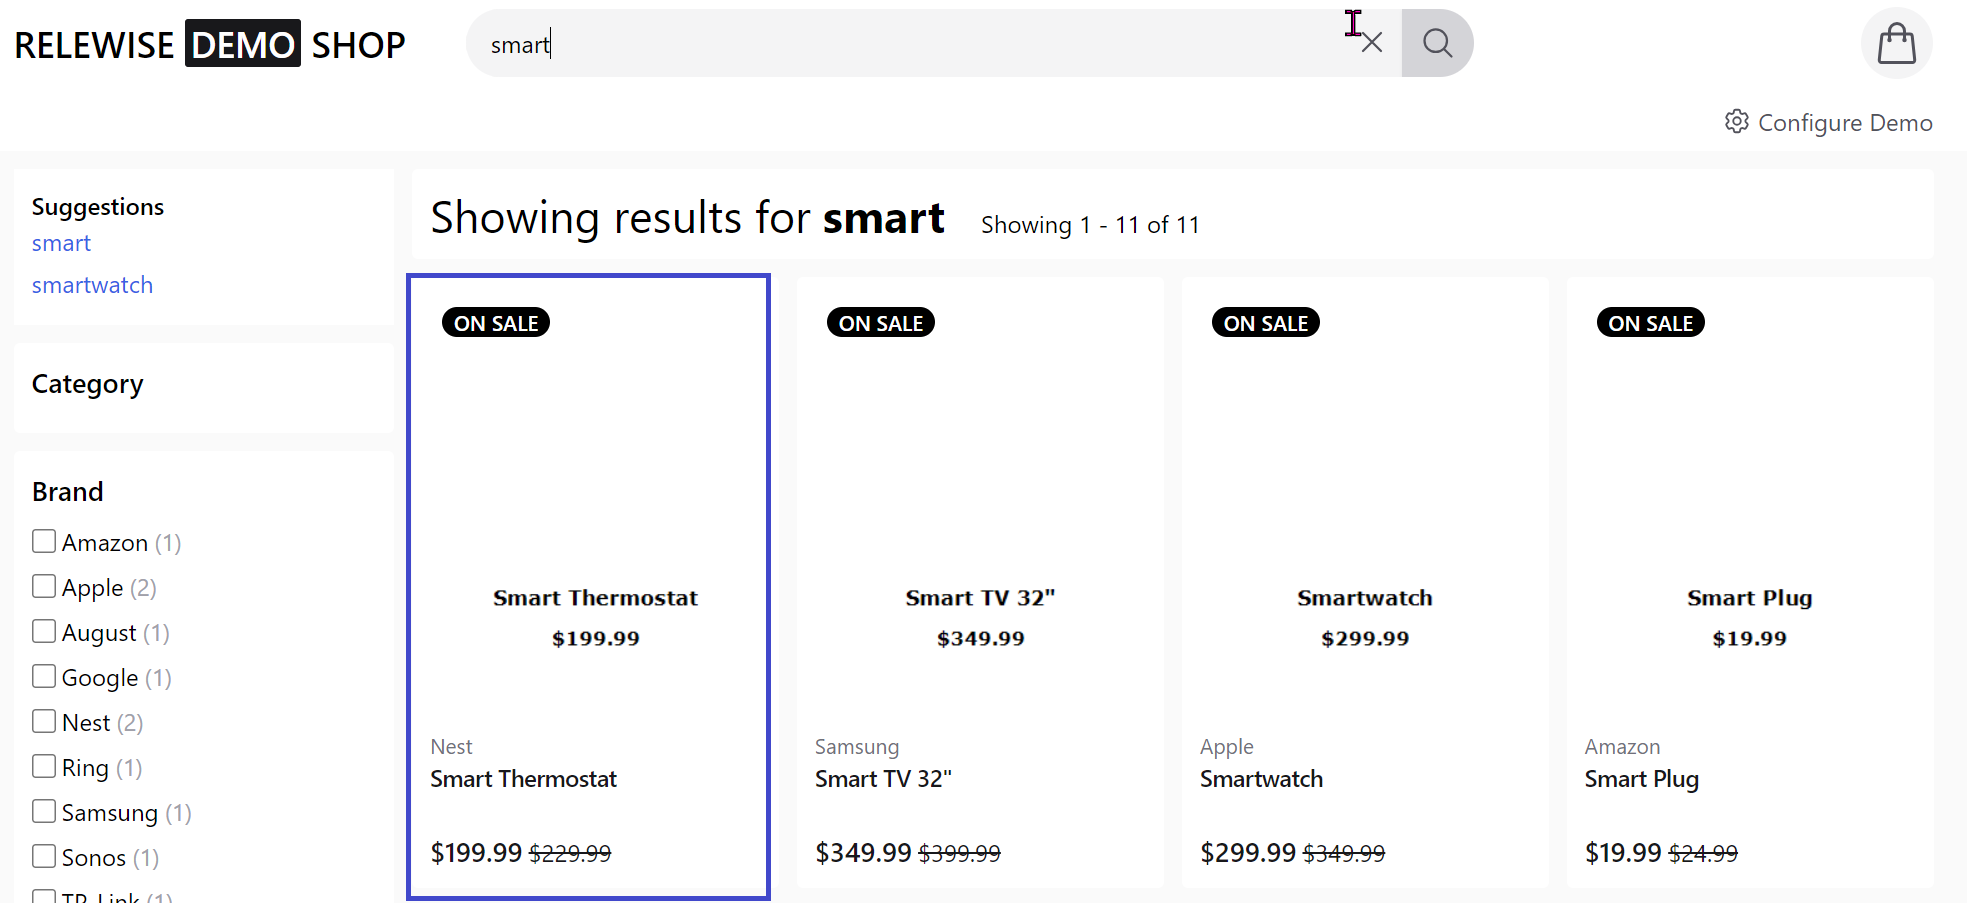
Immediately, our favored product has jumped ahead of all others, thanks to our significant boost to its relevance.
A note on Merchandising
As mentioned above, Merchandising can do a great many things, and is a massively versatile tool for site owners to promote or demote entities that are more or less favored. When you use Relewise on an active shop site, and not merely a demo like this, you will find that personalization on the basis of our user behavior tracking is dominant in establishing what is shown to your users. Merchandising allows you to influence the direction of your users' gaze, which in turn can help you promote sales and marketing efforts. When used in conjunction with the Products Performance page, you will be able to streamline and direct your flow of user traffic towards those products that desperately need the additional views - and away from those that do not.
