Appearance
Manual setup of Relewise in Shopify
This article will guide you through the steps of setting up a Shopify theme with a Relewise integration.
This guide is specifically for a manual setup of the integration to Relewise. For the automated, App-based version, click here.
If you have never downloaded the Shopify Theme to your machine and have always used the Shopify editor, we recommend doing so.
Shopify has excellent documentation on how to do this:
Prerequisites
To proceed, make sure you have the following installed:
- Node.js & npm: Download from nodejs.org (includes npm).
- Git: Install from git-scm.com.
- Shopify CLI: Run in your terminal:sh
npm install -g @shopify/cli@latest
Pulling Your Shopify Theme Locally
- Choose a folder where you want to store your project.
- Open a terminal in that folder and Run the command:sh
shopify theme pull --store YOUR-STORE-URL.myshopify.com - You will be guided to log in to Shopify from the terminal and select the theme you want to pull.
Integrating Shopify with GitHub
Shopify allows you to manage themes via GitHub. Learn more here:
🔗 Shopify + GitHub Integration
Setting Up a Build Tool and Frontend Framework
We use Vite as the build tool and React as the frontend framework.
Install Vite & React
Run the following command:
sh
npm init vite- Set the project name as desired.
- Choose React + TypeScript as the framework.
Install Dependencies
sh
npm installInstall Relewise Client
sh
npm i @relewise/client💡 Pro Tip: Create a .shopifyignore file to exclude files Shopify doesn’t recognize. Example:
🔗 Relewise Shopify Ignore Example
Running the Project
Open the Command Prompt
Navigate to the folder where you downloaded the project. Open the terminal in that folder.Start Shopify Theme Development Mode
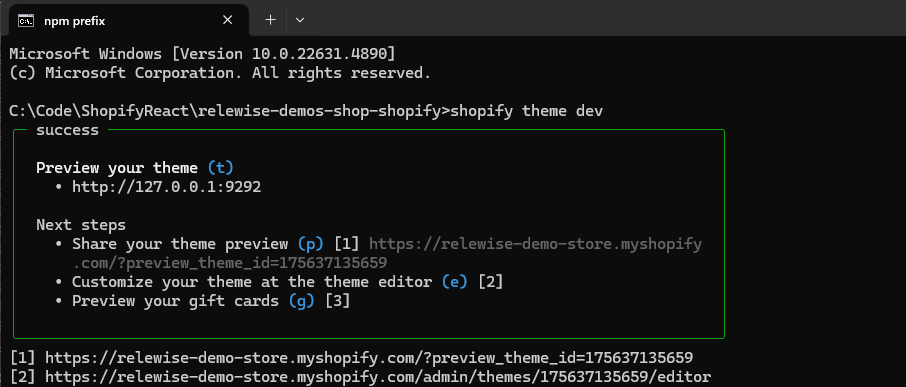
In the terminal run the command:shshopify theme devThis will start the local Shopify theme development mode, allowing you to preview your theme.
What you see in the terminal output:
Preview your theme (press t) → Opens your theme preview in the browser.
Share your theme preview (press p) → Generates a shareable preview link.
Customize your theme in the Shopify editor (press e) → Opens the theme editor.
Build React Components (Listens for changes)
Open another terminal window and run:
shnpm run buildThis ensures your React components are compiled and Shopify can understand them.
Ensuring Vite Builds for Shopify
Shopify requires a compiled version of your React code. Ensure you have a Vite build configuration:
ts
import { defineConfig } from 'vite'
import react from '@vitejs/plugin-react'

// https://vite.dev/config/
export default defineConfig({
  plugins: [react()],
  build: {
    rollupOptions: {
      input: {
        RelewiseCategoryComponent: 'src/RelewiseCategoryComponent.ts',
      },
      output: {
        dir: 'assets',
        entryFileNames: 'vite-[name].js',
        chunkFileNames: 'vite-[name].js',
        assetFileNames: 'vite-[name].[ext]',
      },
    },
    watch: {},
    emptyOutDir: false,

}})
This Vite configuration uses the React plugin to compile our entry file (src/RelewiseCategoryComponent.ts) into bundled assets placed in the assets folder. The naming rules (like vite-[name].js) ensure that Shopify can reliably reference these files.
Creating a Liquid File for the Shopify Section
Create a Shopify Liquid file to embed your React component.
ts
<script src="{{ 'vite-RelewiseCategoryComponent.js' | asset_url }}" defer></script> {% comment %} This is the build file generated by vite {% endcomment %}
{{ 'relewise.css' | asset_url | stylesheet_tag }}

<div
  id="root"
  data-shop-currency="{{ shop.currency }}" {% comment %} That's for extracting the currency from your session {% endcomment %}
  data-collection-id="{{ collection.id }}" {% comment %} That's for extracting the collection id from your session {% endcomment %}
  data-shop-language="{{ shop.locale }}"   {% comment %} That's for extracting the language from your session {% endcomment %}
></div>

{% schema %}
{
  "name": "Relewise Category",
  "settings": [],
  "presets": [
    {
      "name": "Relewise Category"
    }
  ]
}
{% endschema %}
This Liquid snippet loads your precompiled React code and styles into Shopify. The script tag pulls in the vite-RelewiseCategoryComponent.js file. The div id="root" is where the React app mounts, and it carries Shopify data (currency, collection ID, language) via its data attributes. Finally, the {% schema %} block defines the section's metadata for Shopify’s theme editor, making it configurable in your store.
🔗 Shopify Sections Documentation
Creating the Main React Component
Our main React component injects React into the Shopify section.
ts
import { StrictMode } from 'react'
import { createRoot } from 'react-dom/client'
import Category from './Category.ts'

const element = document.getElementById('root'); // This targets the element where we inject React

if (element) {
  const collectionId = element.dataset.collectionId; // Information needed from shopify store
  const currency = element.dataset.shopCurrency;
  const language = element.dataset.shopLanguage;

    createRoot(element!).render( // Rendering the react component if we have the information
      <StrictMode>
        {collectionId && currency && language &&
          <Category collectionId={collectionId} currency={currency} language={language} />
        }
      </StrictMode>,
    );
}
This script injects React into the Shopify theme by selecting the #root element. It extracts key Shopify data (collectionId, currency, language) from the element’s dataset and, if all values are present, renders the Category component inside it using createRoot(). This ensures that the displayed products are dynamically adjusted based on the store’s settings.
Fetching Products from Relewise
🔗 Example Fetch Function - (Due to its size, this in-text example has been omitted.)
This component displays products for a specific collection by fetching data from Relewise using the store’s collection ID, currency, and language. It lets users filter by vendor and navigate through pages of products, showing images, titles, and prices that link to each product’s page.
Setting the User
Setting the user is crucial because it provides Relewise with a context to track and personalize experiences based on individual behavior.
Pagination
Implement pagination in order to show X products per page.
ts
interface PaginationProps {
  pageSize: number;
  total: number;
  currentPage: number;
  goToPage(page: number): void;
}

function Pagination(props: PaginationProps) {
  const pageCount = Math.ceil(props.total / props.pageSize);

  return (
    <>
      {pageCount > 0 && (
        <div className="relewise-pagination-buttons-container">
          <button className="button" disabled={props.currentPage === 1} onClick={() => props.goToPage(props.currentPage - 1)}>
            <span>Previous</span>
          </button>
          <button className="button" disabled={props.currentPage === pageCount} onClick={() => props.goToPage(props.currentPage + 1)}>
            <span>Next</span>
          </button>
        </div>
      )}
    </>
  );
}

export default Pagination;

Adding pagination to your PLP helps your users navigate it.
:::
Creating Facets Based on Vendors
For this example, we have created a facet filter based on the product vendor, but you can customize facets however you like.
ts
import { ProductDataStringValueFacetResult } from "@relewise/client";

interface ProductDataStringValueFacetProps {
  facet: ProductDataStringValueFacetResult;
  setFacet(value: string): void;
  name: string;
}

function CheckListFacet(props: ProductDataStringValueFacetProps) {
  return (
    <>
      {props.facet.available && props.facet.available.length > 0 && (
        <div className="relewise-checklist-facet-container">
          <h3 className="relewise-checklist-facet-title">{props.name} </h3>
          <ul className="relewise-list-item-container">
            {props.facet.available.map((option, index) => (
              <li key={index}>
                {option.value && (
                  <label className="relewise-checklist-item">
                    <input type="checkbox" value={option.value} checked={option.selected} onChange={() => props.setFacet(option.value!)} style={{ marginRight: "8px", accentColor: "#007BFF", cursor: "pointer" }}/>
                    <span>
                      {option.value} {" "}
                      <span className="relewise-facet-options-hits">
                        ({option.hits})
                      </span>
                    </span>
                  </label>
                )}
              </li>
            ))}
          </ul>
        </div>
      )}
    </>
  );
}

export default CheckListFacet;
Facets in Relewise
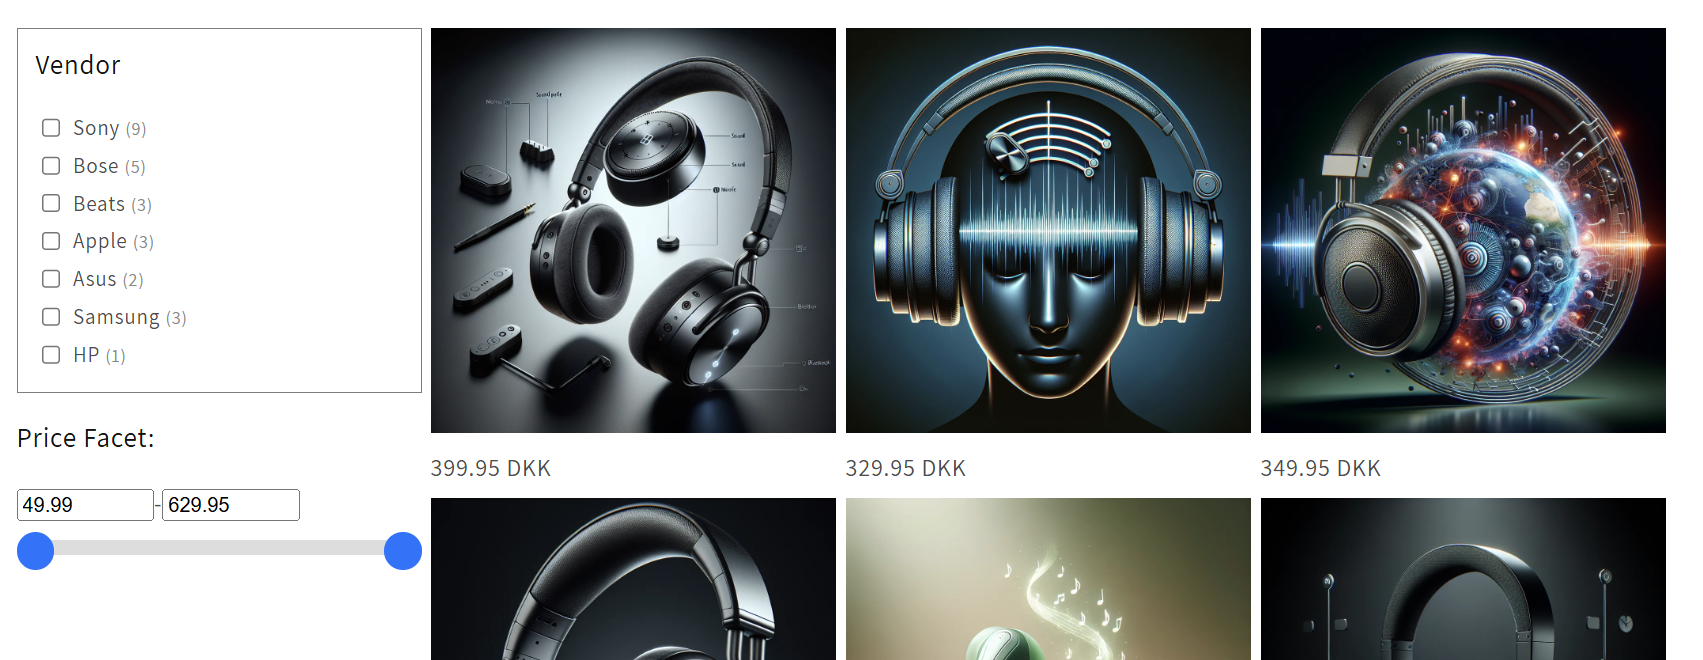
Facets (left) can be added on the basis of any datakey you want. Here, we base it on Vendor and a Price Range
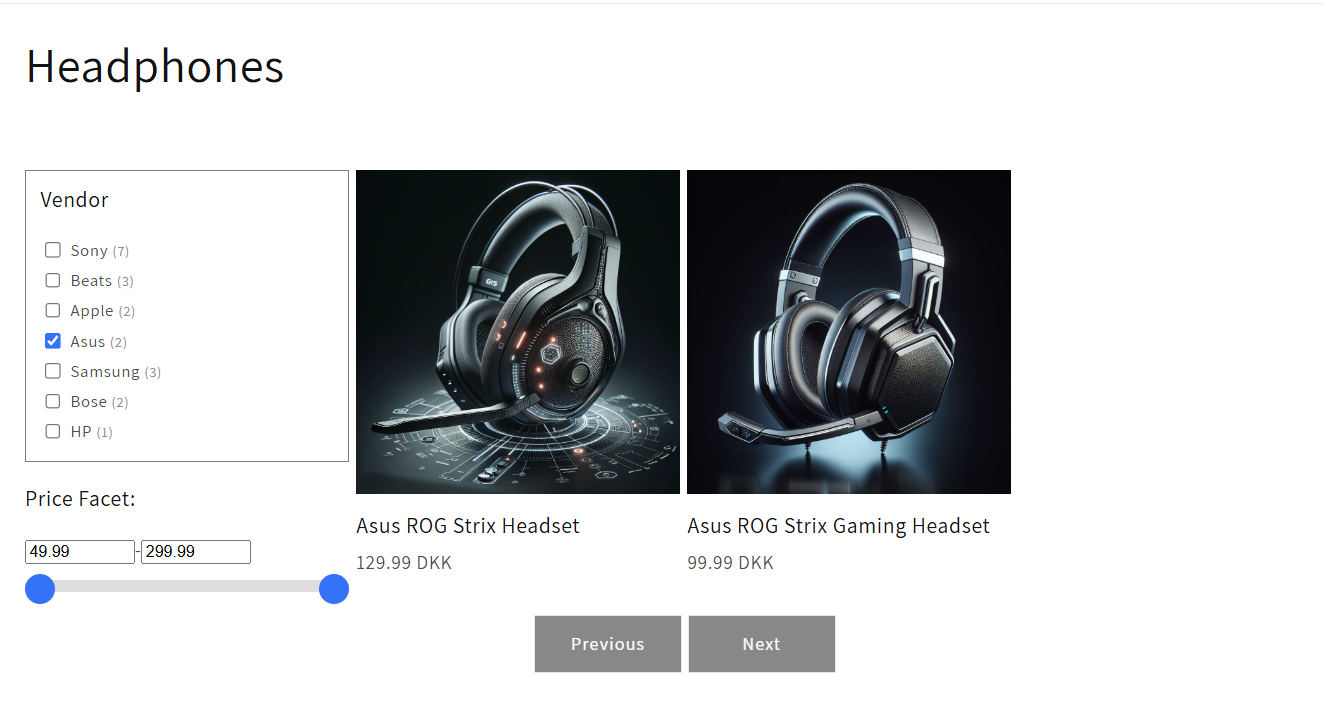
An example of a facet in use, showing only Asus products.
Adding the Section to Shopify
- Open Shopify Theme Editor.
- Select the page where you want to add the section.
- Hide the default Shopify product grid.
- Click "Add Section" → Select the section you created.
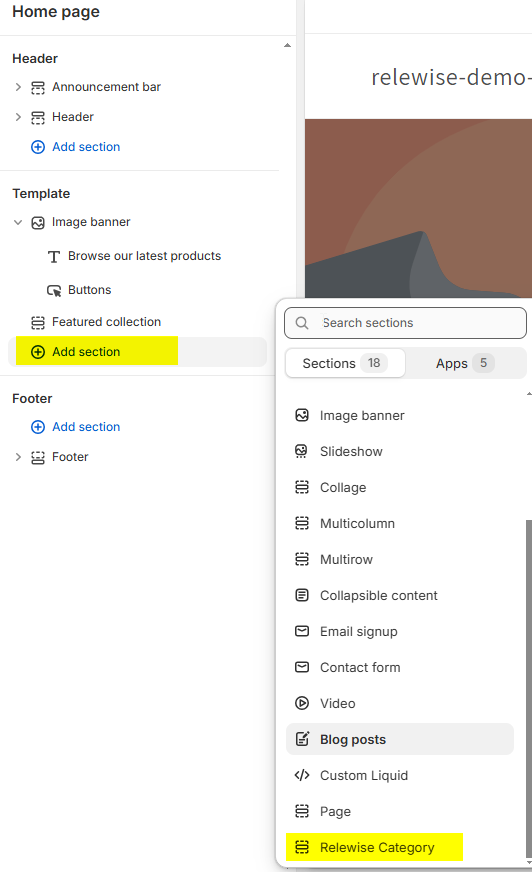
A preview should appear. Save & publish it to production. 🎉

Hit the Publish button to finalize your setup.
Relewise is now fully integrated into your Shopify store, delivering a personalized shopping experience! 🛍️
If you run into any issues, please don't hesitate to reach out to us for help 🚀